Next Reign: Kingdom Buildings Guide
What to place, what to wait on, and which buildings actually unlock the next system.
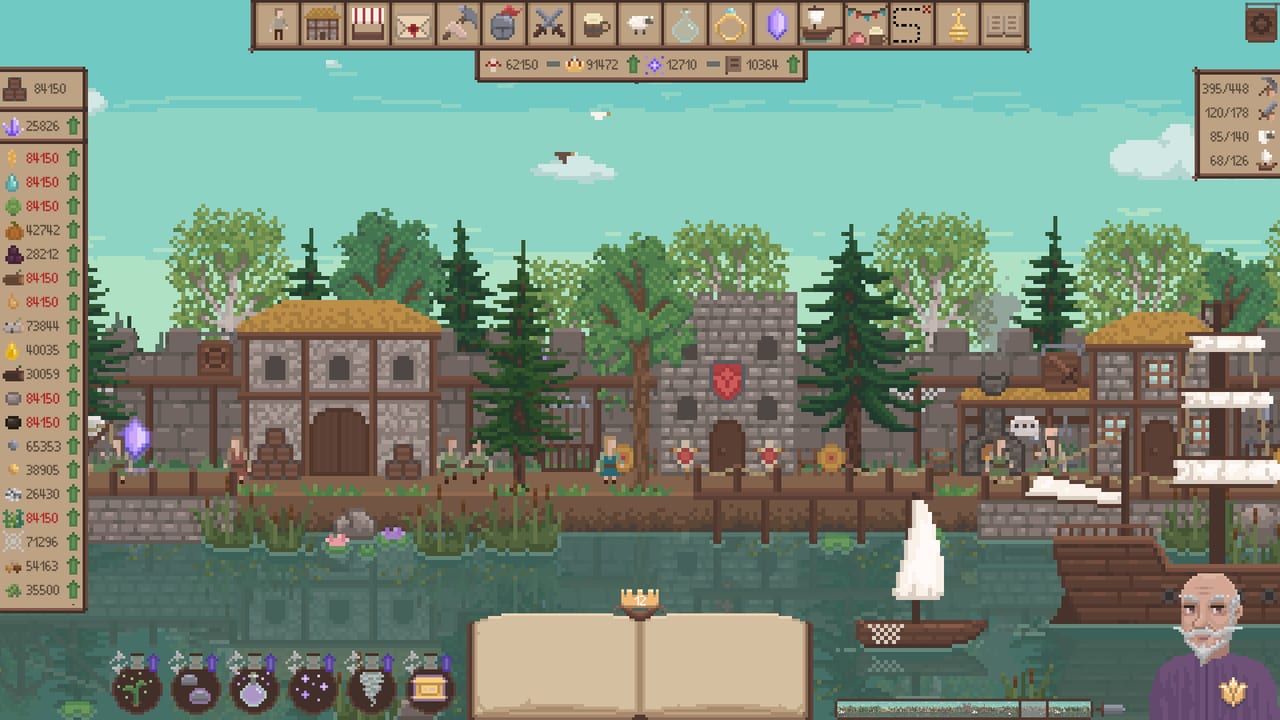
Buildings in Next Reign: Kingdom are unlocks you place, not a SimCity grid. The settlement is a side-scrolling strip. A house is population. A warehouse is a cap. A market is a trade board. If you buy the unlock and never place the structure, the left list will not move. That mistake shows up in almost every first-run video. This page is the build order and the job of each structure. Recipes sit on wheat-to-tools production chains. Rankings sit on the building rankings.
Start from the field. The first-hour settlement checklist already told you not to spend the first wood pile on walls. This guide assumes you can hire a farmer and pan the camera.
Houses
Houses are worker caps. Early houses add space in small chunks (footage shows +5 as the basic bump). You begin with one house and a handful of villagers. When the cap is full, hiring buttons waste your attention. Build the next house before you plan a military.
Wood is the usual cost. That puts houses in direct competition with warehouses, the market, and every later structure. Rule: if you cannot hire the worker the current chain needs, the house wins. Prestige nodes that add house space, extra starting houses, or cheaper buildings reduce how often you have this argument with yourself. They do not make houses optional.
Do not fill the map with houses while the warehouse cap is choking wheat. Unemployed space is not production.
Warehouses
Warehouses raise maximum stock. The starting cap is tight on purpose. Wheat hits a ceiling, wood hits a ceiling, and every craft looks broken until you place the first warehouse. Unlock cost in early footage is modest wood and stone; the important part is the place step. One warehouse is a visual plus a number bump. Extra warehouses are how later chains (bars, tools, hops, potions) have room to exist.
Hover the left resource list if you are not sure you are capped. The expanded panel and the low-stock filter will show piles that cannot grow. That is a warehouse problem until it is not. Prestige extra warehouse storage and starting warehouses are quality-of-life. The first warehouse of each reign is still a manual click unless you bought the start-with-warehouses node.
If you are choosing between a third house and a first warehouse while every number is pegged, take the warehouse. You cannot hire your way out of a cap.
Iron smelter and tool smithy
The smelter is where coal and iron ore become iron bars. The tool smithy is where bars become tools. Build them in that order. A smithy with no bars is a shed. A smelter with no smithy is a bar museum.
These two buildings are the mid-game. They cost wood (and whatever the current unlock gate is) and they demand the miner upgrades that actually gather ore and coal. Place them when those raw piles exist, not when you merely see the buttons. Auto crafting from the prestige tree is what keeps the pair running while you pan to the docks.
A later prestige node can start a reign with a smelter and a smithy already down. That node is a time skip. Until you own it, treat the pair as a project: warehouse space, raw ore, smelter, bars, smithy, tools, worker tiers. The wheat-to-tools production chains page is the recipe; this paragraph is the placement.
Market
The market is the first building that feels like a town. Unlock it with a chunk of wood and a little stone (about 150 wood and 25 stone in the builds players recorded). It opens trading quests. Wheat surplus becomes someone else’s problem. Auto-start trading quests, a prestige unlock, is the reason the market stays relevant after you stop staring at it.
Place the market after a warehouse. Trades need headroom. Place it before you obsess over walls. A walled town that cannot trade is a pretty stall. Favor and other kingdom currencies start making sense once the board exists. If the market button is grey, you are short wood or stone, not “not ready as a player.” Gather, then click.
Walls, castle, docks, ships
Walls are the civilian combat building. They belong next to the first real army, not next to the first farmer. Goblins do not wait for your skyline, but they also do not require a fortress during the wheat tutorial. Build walls when formation combat and the Blade Queen is on the table and you want the town to look like it can take a hit.
The castle is a late landmark. It is the screenshot on the store page, not a first-hour unlock. When it comes up, you are in the campaign’s late stretch: prestige has happened, tools exist, and the phase-by-phase campaign walkthrough is talking about the final quest. Do not dump the wood buffer you need for warehouses into a castle because the silhouette is nice.
Docks and ships are the water edge of the strip. They show up in late-town footage alongside the castle. They are sinks for the same wood and stone, and they feed later routes rather than replacing farmers. If hops, beer, and livestock are still theoretical, you are early for a navy. Place docks when the walkthrough’s late-castle chapter says the shoreline matters.
Other structures you will actually click
Worker-related buildings and upgrades sit in the same top tabs: extra collection, experienced farmer (hops), experienced gatherers for other raw nodes, and the guild-style training that lets tools apply. Tavern layout got a pre-launch tweak so names fit, which is a polite way of saying a tavern exists as part of the late social strip. You do not need it to finish the first market.
Combat does not get a separate barracks building in the sense of an RTS. Units hire from the combat tab and stand in the formation board. The “military buildings” of this game are walls, the economy that pays for units, and the prestige nodes that cheapen them.
Suggested placement order
- Second house when the cap blocks farmers.
- Lumberjacks, then more houses only as needed.
- First warehouse the moment stocks peg.
- Miners, then the market with a wood buffer.
- More warehouses as bars and tools appear.
- Iron smelter, then tool smithy.
- Walls with the first serious army.
- Late castle, docks, and ships when the campaign asks.
That order is also how you spend a post-prestige starting stash of 250 wheat, 150 wood, and 80 stone. The stash is not for a rush castle. It is for skipping the naked-field minute so this list starts at step three.
Building cost reduction around 25% from the prestige tree is one of the best quiet nodes. It makes every item on this list cheaper in wood, which is the resource you always underestimate. Cheaper workers are the other half: houses fill faster if bodies cost less. Look at How to hand the crown before you buy a sixth warehouse on a reign you are about to throw away.
The settlement is allowed to look unfinished. Next Reign: Kingdom scores you on chains and quests, not on roof completeness. Place the next building that unblocks a red arrow. If no arrow is red and no unlock is grey, you are in combat or prestige territory, and the hammer can rest.
Frequently Asked Questions
Quick answers for new rulers and returning prestige runners.
I unlocked a warehouse but stocks are still tiny. Why?
Place it. Unlock and construction are different clicks. The first-hour settlement checklist calls this out because it stalls every new town.
Market or extra house first?
House if you cannot hire. Market if you have surplus wheat, a warehouse, and the wood/stone cost. Wheat-to-tools production chains explains what the board is feeding.
When do I build walls?
With the first serious army, not with the first farmer. Pair them with formation combat and the Blade Queen so the wall is not a substitute for a tank.
Should I rush the castle?
No. It is a late landmark. The phase-by-phase campaign walkthrough puts it after prestige, tools, and a working shoreline plan.
Which buildings are actually S-tier?
Warehouse, market, smelter, smithy as utility. See the building rankings for the list and How to hand the crown for the cost-reduction node that makes all of them cheaper.